4 weekly spread layout ideas for your bullet journal
hello friends!
this is Rafaela from @raffie_journal instagram account! i’m so grateful and beyond excited to write another article for takkti’s blog, bringing you, my bujo lovers, some layout ideas for your weekly spreads.
so, are you struggling with your weekly spreads and trying to make them as different and special as possible but you ran out of ideas? do you like stickers and washi tapes?
i’m here to help you create some beautiful weekly spreads for your bullet journals!

You will need (figure 1):

- a journal (mine is the A5 hardcover bound notebook – ‘’waves’’ design from takkti’s ‘’lines collection’’)
- a ruler
- scissors
- pencil & black fineliner
- white gel pen
- b&w clouds printable kit or the b&w clouds stickers by takkti
- weekdays & numbers washi tapes by takkti
- ‘’oops’’ daily trees washi paper stickers by takkti
first thing you’ll have to do is to print the b&w cloud printable (figure 2). i prefer printing my printables in sticker paper (figure 4) but normal paper is good as well. then, cut each design carefully and gather all the pieces in one place to decide later which ones you will use (figure 3).

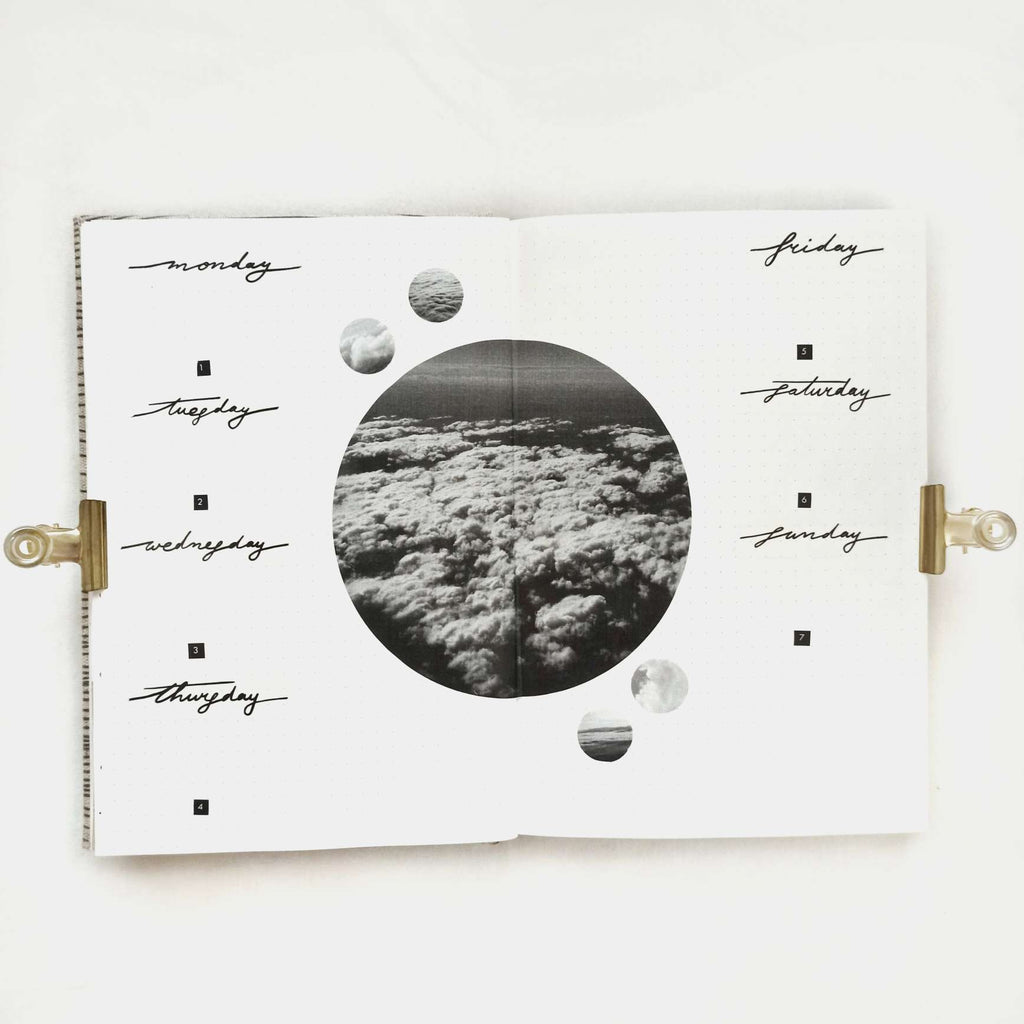
1st weekly layout – the center
for the first layout, you will choose one big circular cloud design and 4 smaller ones from the b&w cloud printable or from the "round" sticker sheets. You will also need, the white thick weekdays and black thin number washi tapes by takkti.
then, stick your big cloud design to the center of the spread and the other 4 above and below it (figure 5).
next, you will measure the page and it’s time for our handy-dandy washi tapes! cut a piece of each day of the week and number (figure 6,7) aaaand your first weekly layout has come to life. simple, fast, practical! what else do you need?

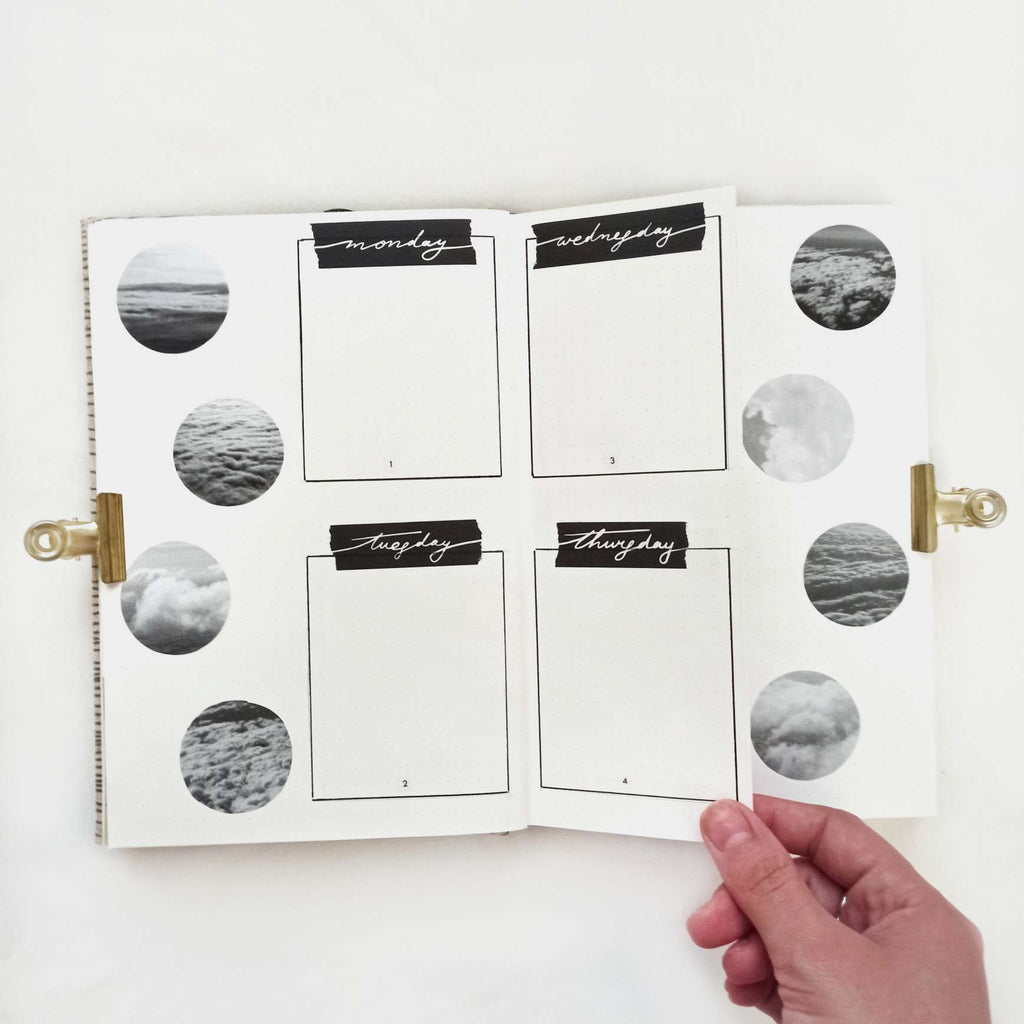
2nd weekly layout – the boxes
for the second layout, the first thing is to sketch and measure your boxes (mine are 6x4 cm). then, you go over the sketch with your black fineliner and your boxes are ready (figure 8). the next step is to use the ‘’oops’’ daily trees washi stickers and put them in the empty spaces. the amazing thing about these stickers is that they are customizable. they actually have a black dot in them so you can write by yourself with a while gel pen the number for each day of the week (figure 9,10). finally, you will need the strip cloud printable designs. there are several of them to choose from. measure and cut your cloud strips in the size of the box (mine is 6 cm) and stick them to the paper. optional: write ‘’notes’’ with your black fineliner in the empty space for the remaining box (if there is one) and you’re done! a little more complex than the first one but still easy and quick, right?


3rd weekly layout – the dutch door
now let’s get into something more special and impressive for our third layout! let’s try to be a bit more crafty! a big trend in bullet journaling is the ‘’dutch door’’ spreads where some of the pages are half cut down, giving an illusion of creating more space in your journal. sounds interesting to you? let’s do that, shall we? primarily, you’ll have to measure your page and cut it almost in half (please don’t be afraid to do so, I promise it will look amazing in the end). now that you have your dutch door (figure 11), you will have to sketch your boxes. measure them (mine are 6,5 x 8 cm) and fit 2 boxes in each page as well as your dutch door in both sides (figure 12,13). then, you will need to stick your black thick weekdays washi and the white thin number washi in all of the boxes (figure 14). finally, you’ll have to take the medium circular cloud designs from the printable and stick them all in the empty spaces to spice it up (figure 15,16)! and you’re good to go! i bet your favorite spreads are with dutch doors from now on haha (this is what happened to me too)


4th weekly layout – the vertical
for the fourth layout, all you need to do is to find the center, create 2 big boxes (mine are 12,5 x 9 cm) and split up each of them into 4 smaller boxes (3 x 3 cm) (figure 17). secondly, you will grab your ‘’oops’’ daily trees washi stickers and place them above each box (figure 18). lastly, all you have to include is 2 large cloud strips and 10 small cloud circular desings above and below the boxes (figure 19). and you’re ready! very easy, right?


i hope that you guys liked these ideas and now you are motivated to create your own special weekly layouts. if you recreate or get inspired by this blog post, we would love to see your work - don’t forget to tag us @takkti and @raffie_journal on instagram!
stay safe & creative,
much love,
Rafaela <3